Mud Flaps' Chev the long slooooow progress
+6
My Little Rockabilly Kat
rustystuff
hewey
leweydafly
DeadSled
mudflap
10 posters
Page 2 of 2
Page 2 of 2 •  1, 2
1, 2
 Re: Mud Flaps' Chev the long slooooow progress
not much but progress all the same
Had a great weekend, Xmas partys All Saturday, we turned up at the Hubertus Club only to find it was Reds cruze night so got to check out a few cars O yea sorry I ment go to a family function
Sunday was mostly chores but i got a little time after lunch to play on the chev


Had a great weekend, Xmas partys All Saturday, we turned up at the Hubertus Club only to find it was Reds cruze night so got to check out a few cars
Sunday was mostly chores but i got a little time after lunch to play on the chev


mudflap- Number of posts : 412
Age : 52
Location : In the shed
Reputation : 2
Points : 278
Registration date : 2008-10-25
 Re: Mud Flaps' Chev the long slooooow progress
Ok After the floor went in I ended up laid up in Hospital so that finished any hopes of any thing else before Christmas, then well January was a write-off, that’s until the weekend of the 23-26th when I managed to get my wife along to the CRAKK, and she's been bitten by the cool car bug again, so it will be all go this year to get the old girl (the Chev) on the road and cruzing
On the weekend just gone I finished off some welding on the floor and was preparing to cut down a bench seat for the front when I was over ruled, and that Falcon Bench / bucket was scraped in favor of a solid bench. So as I didn’t have the parts for that I started filling all the unnecessary holes in the fire wall, in the next day or so I will post picks up (cant find the cabel for the camera ). It was great having the Bec onboard with this project now, I even had her in the work clothes and helping again. Arrrrrrrrrrrrrrrrrrr the good times, But she said at the end of the day was I'm helping on this one, you better not sell the bugger like you did the Fairlane. (I think I’ve been warned)
 .
.
I thought I took more photos than I actually did
Here’s a couple of the fire wall, nothing spectacular, very backyarder actually but here goes


We filled countless bloody holes I think the guys that put the car together must have drilled a new hole every time they ran a wire or cable
The past few weeks have been more work than photos, I’ve made up and installed the front seat belt mounts, I have cut down the bench and mounted it and started working on the steering column, I would like to say I will be sure to post more picks soon, but I’m quite enjoying the quantity of work that is being achieved with out the camera so I will be posting more but when and what of, well your guess is as good as mine


On the weekend just gone I finished off some welding on the floor and was preparing to cut down a bench seat for the front when I was over ruled, and that Falcon Bench / bucket was scraped in favor of a solid bench. So as I didn’t have the parts for that I started filling all the unnecessary holes in the fire wall, in the next day or so I will post picks up (cant find the cabel for the camera
I thought I took more photos than I actually did
Here’s a couple of the fire wall, nothing spectacular, very backyarder actually but here goes


We filled countless bloody holes I think the guys that put the car together must have drilled a new hole every time they ran a wire or cable
The past few weeks have been more work than photos, I’ve made up and installed the front seat belt mounts, I have cut down the bench and mounted it and started working on the steering column, I would like to say I will be sure to post more picks soon, but I’m quite enjoying the quantity of work that is being achieved with out the camera so I will be posting more but when and what of, well your guess is as good as mine


mudflap- Number of posts : 412
Age : 52
Location : In the shed
Reputation : 2
Points : 278
Registration date : 2008-10-25
 Re: Mud Flaps' Chev the long slooooow progress
OK so where up to date

mudflap- Number of posts : 412
Age : 52
Location : In the shed
Reputation : 2
Points : 278
Registration date : 2008-10-25
 Re: Mud Flaps' Chev the long slooooow progress
bout time we had an update 
looking good bud, floor come up a treat
Cheers
Mick
looking good bud, floor come up a treat
Cheers
Mick
 Re: Mud Flaps' Chev the long slooooow progress
Yeah Lookin Good Man!!
PaulG- Number of posts : 187
Reputation : 3
Points : 154
Registration date : 2009-01-14
 Re: Mud Flaps' Chev the long slooooow progress
good work mate, keep the pics commin

shippy- Number of posts : 110
Age : 40
Location : Tweed
Reputation : 0
Points : 89
Registration date : 2008-10-23
 Re: Mud Flaps' Chev the long slooooow progress

who says Sydney guys have nothing to offer the Hot Rodding
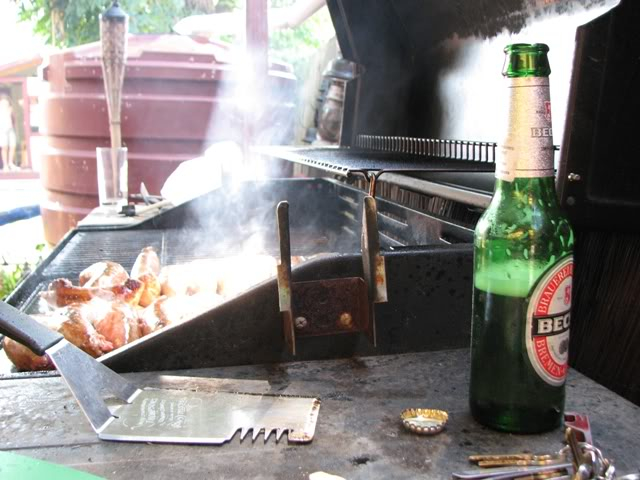
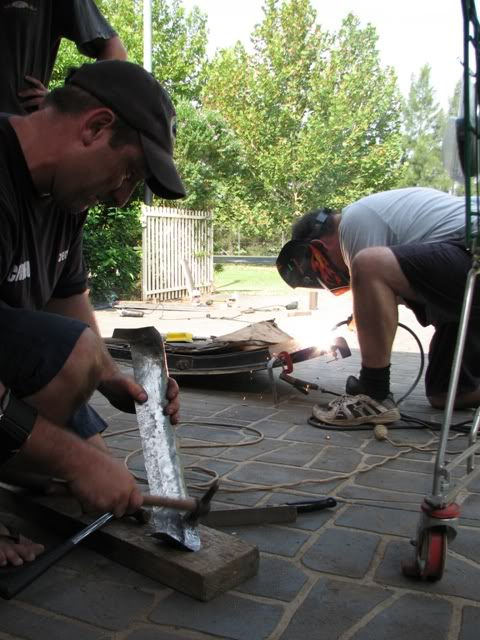
On Sunday Guru Mick had organsied a working bee on my Chev, what was supposed to be a simple cut the bottom of the door skins off and wack some new ones on followed by a BBQ lunch and have a few beers very quickly went down hill and became a full reconstruction on the lower door frames complete with hammer formed sections using the most agricultural of tools, hell one guy even made a stump out of an off cut of timber and used the most suitable hammer I had with a handle "a bunnings claw hammer" Hell these guys all worked extremely hard form the time they arrived until the time they left.
Words cant express how gratefull I am and at the end of the day a good time was had by all and it was a great feeling knowing I’ve met some top mates through Oz-E-Rodders who would do this for a mate.

mudflap- Number of posts : 412
Age : 52
Location : In the shed
Reputation : 2
Points : 278
Registration date : 2008-10-25
 Re: Mud Flaps' Chev the long slooooow progress
The lack of flash was to illustrate the lack of daylight 


Here we see the extravagent workshop set up - Coddington Garage eat your heart out

Nothing but the finest of PPE too

First of all we cut through the doorskin and unpicked it from the frame. Here we saw Cords trying to get the braze from the corner

Unfortuneately the skinless doors revealed this nasty secret! Oh well, may as well hook in and repair it

We decided to hand hammer form the inner frame. First of all mark it out

A quick blat of the grinder on a spare piece of wood made a nice beating post

Skipped a few steps, but basically there was heaps or precision hammering

More test fitting to check progress

More beating

Some annealing to soften the metal

Coming along pretty good!

And then lunch and some liquid refreshment. Truth be told the liquid refreshment started a while before lunch!
Back into it lads. my mate keeps on a hammering while a few of us start on the other door

As you can see the 2nd door was pretty rough too

Reinforcements! my wife overshopped (apprently it was 2 for $80 so she had to get "the Deal"), so theres still plenty of stocks for next time

Cutting out the cancer

Zapping in some replacement steel

Thats looking much more solid!

Just likea bought one!

The push was on to get at least one of the skins on!


special thanks to all those who came out
O yea you probably guessed but Hew was the photographer for the day as well as helper
Here we see the extravagent workshop set up - Coddington Garage eat your heart out

Nothing but the finest of PPE too

First of all we cut through the doorskin and unpicked it from the frame. Here we saw Cords trying to get the braze from the corner

Unfortuneately the skinless doors revealed this nasty secret! Oh well, may as well hook in and repair it

We decided to hand hammer form the inner frame. First of all mark it out

A quick blat of the grinder on a spare piece of wood made a nice beating post

Skipped a few steps, but basically there was heaps or precision hammering

More test fitting to check progress

More beating

Some annealing to soften the metal

Coming along pretty good!

And then lunch and some liquid refreshment. Truth be told the liquid refreshment started a while before lunch!

Back into it lads. my mate keeps on a hammering while a few of us start on the other door

As you can see the 2nd door was pretty rough too

Reinforcements! my wife overshopped (apprently it was 2 for $80 so she had to get "the Deal"), so theres still plenty of stocks for next time

Cutting out the cancer

Zapping in some replacement steel

Thats looking much more solid!

Just likea bought one!

The push was on to get at least one of the skins on!


special thanks to all those who came out
O yea you probably guessed but Hew was the photographer for the day as well as helper

mudflap- Number of posts : 412
Age : 52
Location : In the shed
Reputation : 2
Points : 278
Registration date : 2008-10-25
Page 2 of 2 •  1, 2
1, 2
 Similar topics
» Tiki painting in progress
» 60 Chev Bel-air to good home only
» Wanted Original Chev rocker covers
» Small block Chev, Auto and 10 bolt diff.
» Small Block Chev Exhaust Manifolds needed!
» 60 Chev Bel-air to good home only
» Wanted Original Chev rocker covers
» Small block Chev, Auto and 10 bolt diff.
» Small Block Chev Exhaust Manifolds needed!
Page 2 of 2
Permissions in this forum:
You cannot reply to topics in this forum